# 方法1
du -sh *
du -sh filename
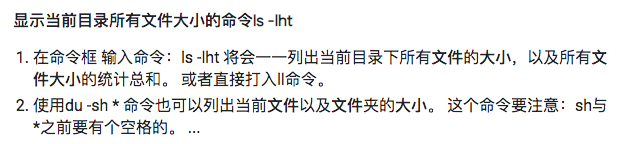
# 方法2
ls -lht

# 方法1
du -sh *
du -sh filename
# 方法2
ls -lht
今天用golang发送email,结果运行之后 发现v2不好使了,ping也ping不通了,重启之后解决了问题
但是老是重启也不是办法,其实只要清除本地的dns缓存即可
sudo killall -HUP mDNSResponder
Sublime自带命令行工具路径为/Applications/Sublime\ Text.app/Contents/SharedSupport/bin/subl
通过ln命令为上述subl工具创建一个快捷方式,并将此快捷方式放到/usr/local/bin路径下,此路径是包含在$PATH中
$ mkdir -p /usr/local/bin
$ sudo ln -s /Applications/Sublime\ Text.app/Contents/SharedSupport/bin/subl /usr/local/bin/subl
$ ls -l /usr/local/bin/subl  //查看软链接状态

# install on ubuntu
sudo apt install mysql-server
# install on rasp-pi
sudo apt install mariadb-server-10.0
# 默认mariadb是没有密码的,sudo权限就可以进入
sudo mysql
# sudo mysql -u root -p
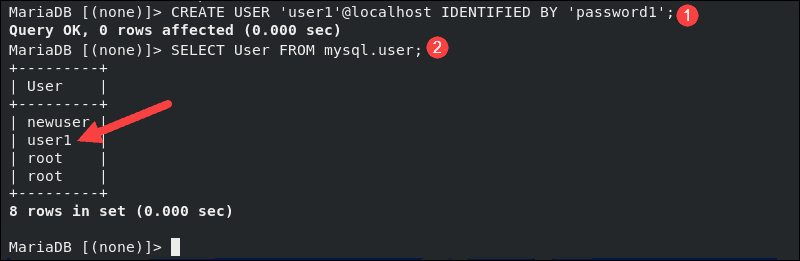
# Create New MariaDB User
CREATE USER 'user1'@localhost IDENTIFIED BY 'password1';
# Once you create user1, check its status by entering:
SELECT User FROM mysql.user;
Grant Privileges to MariaDB User
The newly created user does not have privileges to manage databases nor to access the MariaDB shell.
To grant all privileges to user1:
GRANT ALL PRIVILEGES ON *.* TO 'user1'@localhost IDENTIFIED BY 'password1';
The *.* in the statement refers to the database or table for which the user is given privileges. This specific command provides access to all databases located on the server. As this might be a major security issue, you should replace the symbol with the name of the database you are providing access to.
To grant privileges only for yourDB, type the following statement:
GRANT ALL PRIVILEGES ON 'yourDB'.* TO 'user1'@localhost;
It’s crucial to refresh the privileges once new ones have been awarded with the command:
FLUSH PRIVILEGES;
The user you have created now has full privileges and access to the specified database and tables.
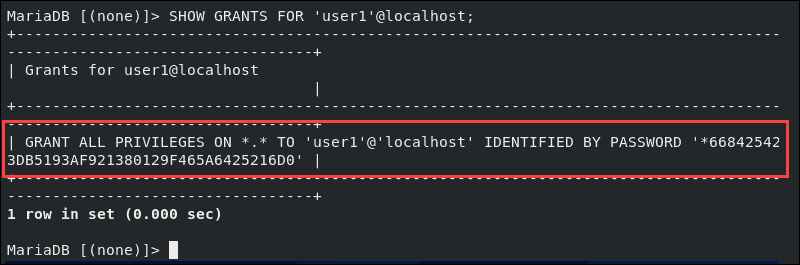
Once you have completed this step, you can verify the new user1 has the right permissions by using the following statement:
SHOW GRANTS FOR 'user1'@localhost;
The information provided by the system is displayed on the terminal.
如图,这样是会报错的

应该这样:
scp -P 39999 -r slimx store@192.168.31.183:~/go/src/github.com/scott-x
sudo ufw allow 80
允许外部访问80端口

sudo ufw delete allow 80
禁止外部访问80 端口

sudo ufw allow from 192.168.1.1
允许此IP访问所有的本机端口

sudo ufw deny smtp
禁止外部访问smtp服务

sudo ufw delete allow smtp
删除上面建立的某条规则

sudo ufw deny proto tcp from 10.0.0.0/8 to 192.168.0.1 port
要拒绝所有的流量从TCP的10.0.0.0/8 到端口22的地址192.168.0.1

sudo ufw allow from 192.168.31.21 to any port 9000
$ sudo ufw -h
[sudo] password for store:
ERROR: Invalid syntax

Usage: ufw COMMAND

Commands:
 enable                          enables the firewall
 disable                         disables the firewall
 default ARG                     set default policy
 logging LEVEL                   set logging to LEVEL
 allow ARGS                      add allow rule
 deny ARGS                       add deny rule
 reject ARGS                     add reject rule
 limit ARGS                      add limit rule
 delete RULE|NUM                 delete RULE
 insert NUM RULE                 insert RULE at NUM
 route RULE                      add route RULE
 route delete RULE|NUM           delete route RULE
 route insert NUM RULE           insert route RULE at NUM
 reload                          reload firewall
 reset                           reset firewall
 status                          show firewall status
 status numbered                 show firewall status as numbered list of RULES
 status verbose                  show verbose firewall status
 show ARG                        show firewall report
 version                         display version information

Application profile commands:
 app list                        list application profiles
 app info PROFILE                show information on PROFILE
 app update PROFILE              update PROFILE
 app default ARG                 set default application policy
#rename
F2
# screen cut
printscreen # 系统自带的shift+s功能太局限
# nvdia 录屏/保存快捷键
ctrl+F9
# copy 为达到和mac一样的体验 把left alt映射为了ctrl
ctrl/alt+c
shift+O:调节画板大小